Wednesday, March 30, 2016
It's a cookie! No, wait!
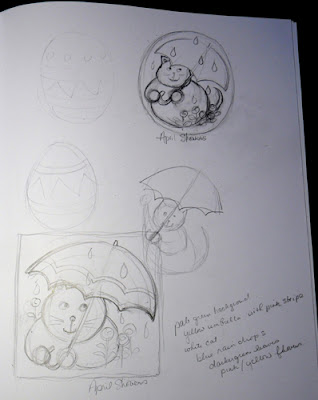
I was doodlin' around in my sketchbook the other night, and came up with a cute design (I think!) for a spring cookie. Here, you can see a photo of the page in my book. I liked the round-ish one at the top, and I still may do something with it. However the final sketch (at the bottom) is the one I decided on for the cookie.
But I just couldn't shake the idea that a good image is a good image, whether it's on a cookie or a quilt.
That made me think that it might be cool to make a baby quilt using 6 different cookie designs. Twelve 12-inch quilt blocks, where the 6 images are also used in reverse. I'll be doing mine scrappy! (Natch! cuz I do like a scrappy quilt.) I haven't worked out all the details yet, because that is part of the fun, but if you'd like to work along with me on a Cookie Cat Quilt, here's the PDF for the first block.
It will fit on an 8-1/2 inch. square. I added 3 inch borders to all 4 sides, but I intend to quilt-as-I-go, so I've allowed a little bit of wiggle room to square up the finished blocks to 12-1/2 inches, and that means the finished quilt (with 12 blocks) will be a crib-sized quilt.
Saturday, March 26, 2016
Friday, March 25, 2016
No bunny cutter? No problem!
I don't own a lot of cookie cutters. Sometimes I cut my cookies by hand, but that's a little slow. That's one of the reasons my cookies are often basic shapes like ovals or circles.
If you don't own an Easter bunny cutter, that's easily remedied. Cut a circle and a heart. Then cut the point off the heart with the circle cutter, and place the 2 pieces close together on the cookie sheet. Baking glues them together. And then, you can ice them like this!
If you don't own an Easter bunny cutter, that's easily remedied. Cut a circle and a heart. Then cut the point off the heart with the circle cutter, and place the 2 pieces close together on the cookie sheet. Baking glues them together. And then, you can ice them like this!
Tuesday, March 1, 2016
Subscribe to:
Comments (Atom)


