

Showing posts with label A Day in the Life. Show all posts
Showing posts with label A Day in the Life. Show all posts
Sunday, June 12, 2016


Friday, June 10, 2016

Monday, June 6, 2016
The golden hour and a few 'instructions'
Here's Cassie catching the last of the sun's rays before sun down.

And here's the blank canvas for a new quilt block.

I haven't been very specific about cutting the fabric, because I really wasn't sure anyone cared. However, if you're working along with me, these 8 inch blocks are made by cutting a background that is 8 1/2 inches square. Cut 2 inner borders 1 1/2 inches x 8 1/2 inches and 2 more inner borders that are 1 1/2 inches x 10 1/2 inches. Cut 2 outer borders 3 1/2 inches x 10 1/2 inches and 2 that are 3 1/2 inches x 17 inches. The finished block will be trimmed.
Layer the assembled blank canvas block on a 17 inch square piece of Warm and Natural quilt batting, and fuse and stitch the appliqué components in place.
For some of the blocks in this quilt, you'll need to complete the appliqué BEFORE you add the borders. You'll know which ones those are. It's not rocket science. :)
A word about fusing... I use Heat & Bond Lite. I trace the appliqué patch, but before I press it to the fabric, I trim out the centre part of the patch, so only the edges get fused. I do that because I want my quilt to be nice and soft and drapey. I don't want it to be stiff. However, if you're making a tote bag, the extra stiffness would probably be a good thing.

And here's the blank canvas for a new quilt block.

I haven't been very specific about cutting the fabric, because I really wasn't sure anyone cared. However, if you're working along with me, these 8 inch blocks are made by cutting a background that is 8 1/2 inches square. Cut 2 inner borders 1 1/2 inches x 8 1/2 inches and 2 more inner borders that are 1 1/2 inches x 10 1/2 inches. Cut 2 outer borders 3 1/2 inches x 10 1/2 inches and 2 that are 3 1/2 inches x 17 inches. The finished block will be trimmed.
Layer the assembled blank canvas block on a 17 inch square piece of Warm and Natural quilt batting, and fuse and stitch the appliqué components in place.
For some of the blocks in this quilt, you'll need to complete the appliqué BEFORE you add the borders. You'll know which ones those are. It's not rocket science. :)
A word about fusing... I use Heat & Bond Lite. I trace the appliqué patch, but before I press it to the fabric, I trim out the centre part of the patch, so only the edges get fused. I do that because I want my quilt to be nice and soft and drapey. I don't want it to be stiff. However, if you're making a tote bag, the extra stiffness would probably be a good thing.
Sunday, June 5, 2016
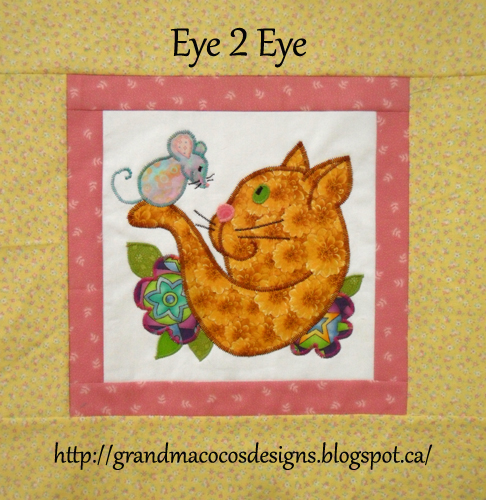

Saturday, June 4, 2016
Nap Time
If we're going to document all the things a cat gets up to in a day, we can't forget this one.

I almost forgot! Here's the link to the template, but don't be hemmed in....move those flowers around any way you like. https://drive.google.com/file/d/0B92VRZIKoVZaekxpWW5qbi1jeVk/view?usp=sharing

I almost forgot! Here's the link to the template, but don't be hemmed in....move those flowers around any way you like. https://drive.google.com/file/d/0B92VRZIKoVZaekxpWW5qbi1jeVk/view?usp=sharing
Wednesday, June 1, 2016
Hello!

There are a few small blocks in the new quilt. Just for interest. The template for this one should print at 4inches square. Add an inner border that is 1/2 inch wide (finished measurement) and an outer border that is 1 1/2 inches wide.
Since the cookie tin was empty, I used this design to make a few cookies. Quick cookies!
Tuesday, May 31, 2016
Magic!
Most days, it is true, what I do is really play. It's fun. Today, it was more than fun. Today, a little magic happened in my sewing room. Here's the block:

That cotton eyelet lace is only stitched on one edge, to create the illusion of the cat peeking out. This one is for my friend Polly, who I suspect is very adept at the ambush manoeuver. I have to admit that Cassie doesn't see the point. And even though I made a slight miscalculation in the width of this block, it will all turn out OK. Have faith! It's not rocket science. It's just play.
This block is one of the smaller ones. It should print at 4inches x 8inches. It will have a 1/2inch border and a 1 1/2inch border. And then, for it to fit in the grand scheme of things, it needs to have a 2inch band added to each vertical edge. Total block size: 8inches x 16inches. These are the finished numbers. If you're playing along, be sure to add seam allowances.
Yesterday's block printed at 8inches x 8inches. It had a one inch inner border and then a 3inch border. Total block size: 16inches square. Again.....seam allowances are not included in these numbers!
I almost forgot. Here's the link to get the template.

That cotton eyelet lace is only stitched on one edge, to create the illusion of the cat peeking out. This one is for my friend Polly, who I suspect is very adept at the ambush manoeuver. I have to admit that Cassie doesn't see the point. And even though I made a slight miscalculation in the width of this block, it will all turn out OK. Have faith! It's not rocket science. It's just play.
This block is one of the smaller ones. It should print at 4inches x 8inches. It will have a 1/2inch border and a 1 1/2inch border. And then, for it to fit in the grand scheme of things, it needs to have a 2inch band added to each vertical edge. Total block size: 8inches x 16inches. These are the finished numbers. If you're playing along, be sure to add seam allowances.
Yesterday's block printed at 8inches x 8inches. It had a one inch inner border and then a 3inch border. Total block size: 16inches square. Again.....seam allowances are not included in these numbers!
I almost forgot. Here's the link to get the template.
Monday, May 30, 2016
A Day in the Life

Ready to begin a new quilt? This one's feline-related, too. I had so many sketches for the Kitty Cookie Quilt that themes began to emerge. This quilt is all about what a cat gets up to in a day, and believe me! they get up to quite a lot. Let's start with breakfast.
Here's the line drawing:

And as usual, if you want to work along with me, you'll find the actual appliqué template here:
If you download the template, remember that it should print at 8 inches square, but you can do it any size you like. The fuzzy slippers are tricky, so don't bother to trace every single point. I know I didn't.
Subscribe to:
Posts (Atom)